At Guelph Concrete LTD, we’ve been providing top-quality concrete services in Guelph, Ontario for over 15 years. If you’re looking to install a waterproof membrane on your foundation, here’s how we ensure a flawless application every time.
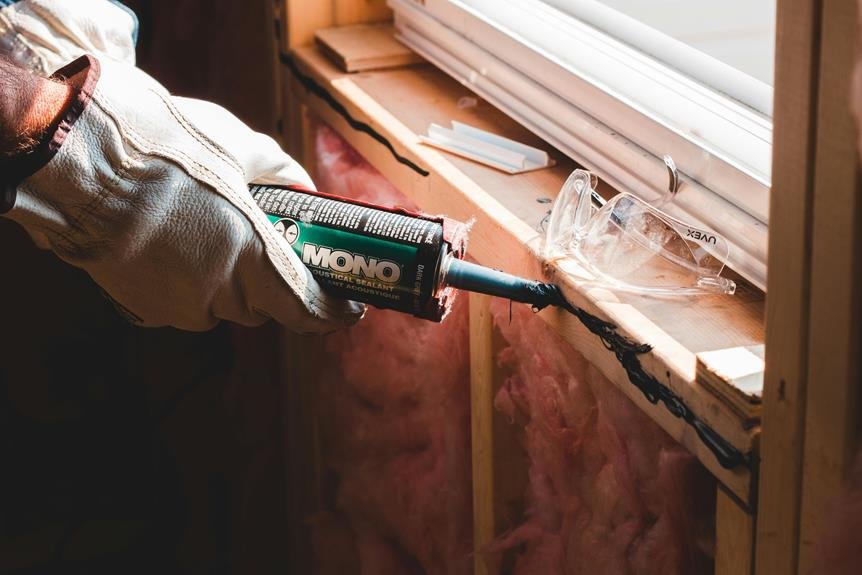
First, we gather all necessary tools such as a trowel, utility knife, and roller. Next, we meticulously clean and dry the foundation, inspecting and repairing any cracks to ensure a smooth surface. After that, we apply an even coat of primer and allow it to dry thoroughly.
Once the primer is set, we cut the waterproof membrane to the required dimensions. We carefully align it to the foundation and secure it with high-quality adhesives. Our experienced team ensures there are no gaps or bubbles, providing you with a seamless, watertight barrier.
While DIY installations are possible, the precision and expertise required often make professional help the best option. At Guelph Concrete LTD, we have the experience and skills to install your waterproof membrane correctly and efficiently.
For a flawless installation and peace of mind, contact Guelph Concrete LTD for a free estimate. Call us today at 548-490-2074.
Gather Necessary Tools
Before we start installing the waterproof membrane, let’s gather all the necessary tools to secure a smooth and efficient process. First off, having our tools organized will save us a lot of time and hassle. We’ll need a trowel, utility knife, roller, paintbrush, and gloves. These are essential in applying the membrane correctly and efficiently.
For a thorough and effective job, a few more items are necessary. Make sure we’ve a primer, waterproofing membrane, and reinforcing fabric on hand. These materials are vital for employing proper waterproofing techniques.
Next, let’s not forget about safety. A stable ladder, safety goggles, and sturdy work gloves are non-negotiable. Prioritizing safety precautions ensures we avoid any unnecessary accidents.
Installation tips include following the manufacturer’s instructions for the specific waterproof membrane product. This guarantees we achieve best results. Keep in mind that a clean and dry foundation surface is essential for proper adhesion.
Prepare the Foundation
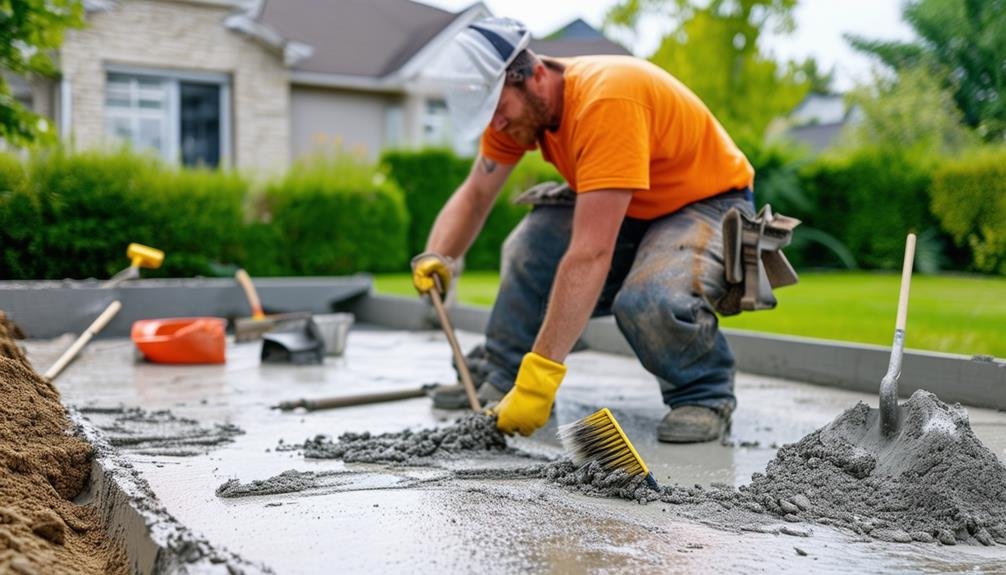
Now that we’ve gathered all our tools and materials, let’s focus on preparing the base to secure a clean and dry surface for the waterproof membrane. Base cleaning is an important initial step in the waterproofing process. We’ll start by thoroughly removing dirt, debris, and any loose materials from the foundation. A clean surface is essential for proper adhesion of the membrane.
Next, we need to confirm the foundation is completely dry. Moisture can interfere with the waterproofing application, so let’s allow adequate drying time or use a heat gun if necessary. Once dry, we’ll inspect the foundation for any cracks or imperfections. Repairing these is necessary to achieve a smooth, even surface for the membrane.
Here’s a quick checklist to guide our surface preparation:
| Step | Description | Tools Needed |
|---|---|---|
| Cleaning | Remove dirt, debris, and loose materials | Broom, Brush, Vacuum |
| Drying | Confirm foundation is dry | Heat Gun (optional) |
| Inspection | Check for cracks and imperfections | Flashlight, Mirror |
| Repair | Fix any cracks or uneven surfaces | Crack Filler, Trowel |
| Final Check | Confirm a smooth and clean surface | Hand Inspection |
Following these steps meticulously confirms our foundation is ready for the waterproofing application, setting us up for a successful waterproofing process.
Apply Primer
Let’s establish a strong connection between the foundation and the waterproof membrane by applying a suitable primer. Before we jump into the primer application, it’s essential to make sure the surface preparation is thorough. A clean, dry, and even foundation surface is necessary for maximizing adhesion strength and enhancing waterproofing effectiveness.
We’ll start by selecting a primer that’s compatible with both the foundation material and the waterproof membrane we’re using. This choice is key to creating a seamless and durable connection.
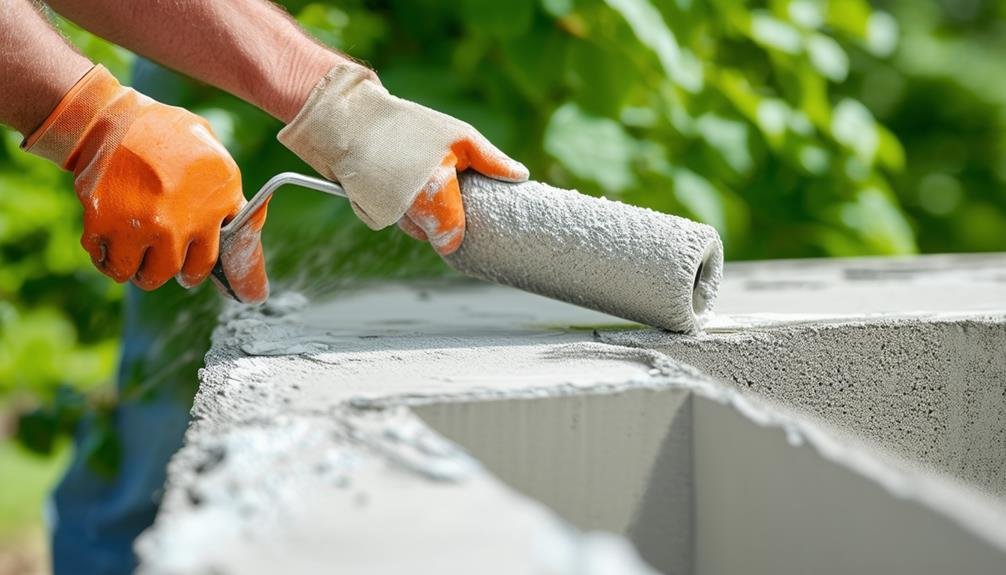
Once we’ve the right primer, we’ll apply it evenly across the entire foundation surface. Using a roller or brush, we’ll work the primer into every nook and cranny, sealing pores and creating a smooth, uniform base.
As we apply the primer, we’ll pay close attention to the coverage, making sure no spots are missed. This step isn’t just about adhesion strength but also about preparing the surface to receive the membrane effectively.
After applying the primer, we’ll allow it to dry completely as per the manufacturer’s guidelines. This drying time is vital for achieving the best possible connection and ensuring our waterproofing system performs efficiently.
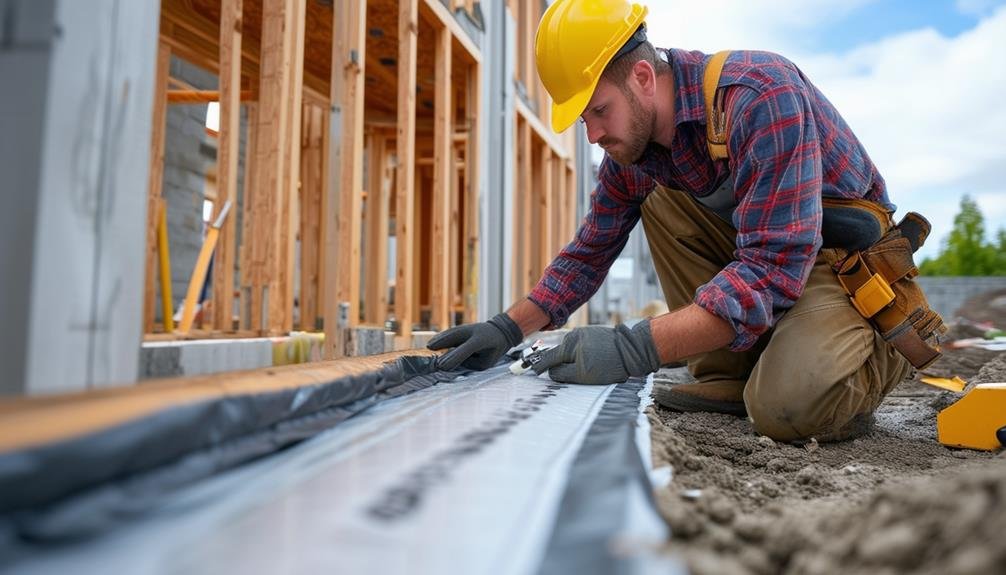
Cut and Position Membrane

Now that our primer is set, let’s measure and cut the waterproof membrane to fit the foundation precisely.
At Guelph Concrete LTD, with over 15 years of experience, we align the membrane from the bottom up, ensuring it’s positioned correctly.
Finally, we secure and inspect the edges to make sure everything is tightly sealed and ready to protect against water.
For expert waterproofing services, contact Guelph Concrete LTD for a free estimate. Call us today at 548-490-2074!
Measure and Cut Membrane
To guarantee a snug fit, we start by measuring the height of the foundation wall and cutting the waterproof membrane accordingly. This step is essential for effective foundation waterproofing, securing the membrane covers every inch of the wall without gaps. By doing so, we create a continuous barrier against water infiltration.
Here’s how we do it:
- Measure and Mark: Using a tape measure, we determine the height of the foundation wall. We then transfer these measurements onto the waterproof membrane, marking the cut lines clearly.
- Cut the Membrane: With a utility knife, we carefully cut the membrane along the marked lines. This step requires precision to secure we don’t waste material and that the membrane fits perfectly.
- Prepare the Membrane for Application: Before we position the membrane, we smooth out any wrinkles and make sure it’s clean and dry. This preparation is important for proper membrane adhesion techniques, securing the waterproofing membrane sticks effectively to the foundation.
Align With Foundation
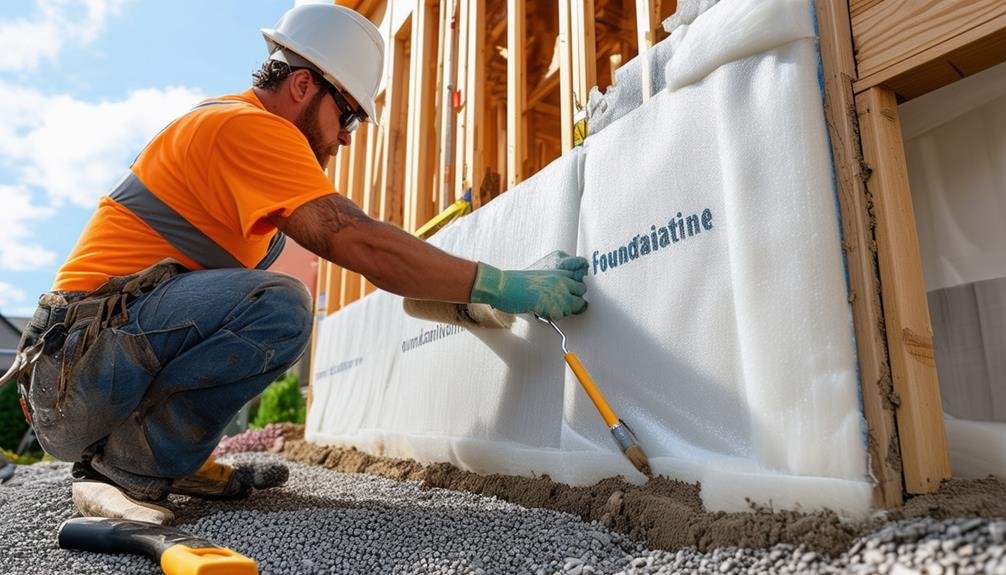
Aligning the waterproof membrane with the foundation is essential to guarantee a seamless and effective barrier against moisture. We need to confirm proper foundation alignment to maximize the performance and longevity of our waterproofing efforts. Let’s start by following some key waterproofing techniques and installation tips.
First, after we’ve measured and cut the membrane, it’s time to position it. Carefully align the membrane with the foundation walls, verifying it fits accurately without any gaps or overlaps. This step is crucial for effective waterproofing, as even small misalignments can compromise the barrier and allow water infiltration.
Next, let’s make sure the membrane is flush against the foundation surface. Press it firmly to validate it adheres well, and take care to smooth out any wrinkles or air pockets. Proper foundation preparation, which we’ve already completed, will make this step easier and more effective.
Secure and Inspect Edges
Why is it so important to secure and inspect the edges of the waterproof membrane?
Proper edge sealing techniques and waterproofing inspection are vital to prevent water infiltration and guarantee long-lasting protection for the foundation.
Let’s delve into the steps we need to follow to get it right:
- Trim and Overlap:
First, we trim the waterproof membrane to size, making sure it overlaps the edges by at least 2 inches. This overlap is essential for a secure seal that keeps water out.
- Position and Align:
Position the membrane along the foundation wall, starting from the lowest point and working upwards. Proper membrane alignment is crucial to avoid any gaps or wrinkles that might compromise the waterproofing.
- Press and Examine:
Use a roller or brush to press the membrane firmly against the foundation wall. This step ensures full contact and effective waterproofing. After pressing, conduct a thorough edge integrity inspection to check for any misalignments or gaps.
Secure Membrane
Now that we’ve cut and positioned the membrane, it’s essential to secure it properly to guarantee effective waterproofing. At Guelph Concrete LTD, with over 15 years of experience serving Guelph, Ontario, we understand the importance of creating a durable barrier against water infiltration.
We’ll explore membrane attachment techniques, guaranteeing proper adhesion, and the tools and materials needed for the job. Trust our expertise to ensure your project is completed to the highest standards.
For a free estimate on your waterproofing needs, contact Guelph Concrete LTD at 548-490-2074.
Let’s help you protect your investment with our professional services.
Membrane Attachment Techniques
To guarantee our waterproof membrane stays secure and effective, we’ll use specialized adhesives and mechanical fasteners to attach it firmly to the foundation. Choosing the right adhesive is essential for a strong bond. Here’s what we need to keep in mind:
- Adhesive Selection and Installation Tips:
We should opt for high-quality, waterproof adhesives specifically designed for foundation membranes. Apply the adhesive evenly and follow the manufacturer’s instructions carefully to guarantee maximum adhesion.
- Mechanical Fasteners for Added Security:
In high-stress areas, using mechanical fasteners like screws or nails provides extra stability. These fasteners enhance the waterproofing effectiveness by ensuring the membrane stays in place, even under pressure. When installing, make sure to space the fasteners according to the guidelines to avoid any gaps or overlaps.
- Waterproofing Effectiveness:
Proper attachment techniques are crucial. By combining adhesive selection with mechanical fasteners, we reinforce the membrane’s ability to protect the foundation from water infiltration. This dual method is particularly effective in Guelph’s variable climate, guaranteeing long-term success.
Ensuring Proper Adhesion
Before we secure the membrane, let’s make certain the foundation surface is spotless and free of any debris. This step is pivotal because any dirt, debris, or contaminants can hinder the adhesion techniques we’ll be using.
To guarantee a strong bond, we need to use a suitable adhesive or waterproofing compound. Check the manufacturer’s recommendations for the best product to use. It’s one of the most valuable waterproofing tips we can follow to evade common installation challenges.
Next, we’ll apply the waterproof membrane evenly and smoothly. Be vigilant about avoiding wrinkles, bubbles, or gaps, as these can compromise the membrane bonding and the overall effectiveness of our barrier. Press the membrane firmly onto the foundation surface, ensuring it adheres properly.
After the membrane is applied, it’s imperative to allow it to cure or set according to the manufacturer’s instructions. This step ensures maximum adhesion and long-lasting waterproofing protection.
Tools and Materials Needed
Let’s gather the essential tools and materials to guarantee a smooth and effective installation of the waterproof membrane on the foundation. Proper preparation is key to making sure the membrane does its job perfectly, keeping our foundation safe from water infiltration.
Here’s what we need:
- Tools:
- Trowel
- Gloves
- Safety goggles
- Materials:
- Waterproof membrane (like Aqua-Bloc)
- Preparation Items:
- Cleaning supplies to ensure the foundation is clean, dry, and free of debris
Using these tools and materials, we can achieve a high-quality installation. It’s important to weigh various waterproofing options and their cost comparison to choose the best fit for our needs. Aqua-Bloc, for example, is a reliable choice for many homeowners.
When it comes to the actual application, we’ll need to follow the manufacturer’s instructions closely, especially for drying times. Multiple layers of the membrane should be applied, making sure each one is properly overlapped and sealed to create a watertight barrier.
Deciding between a DIY vs professional installation has its pros. DIY can save us money, but professionals bring experience and expertise, potentially offering a longer-lasting solution. Let’s assess our options carefully to make the best choice for our project.
Inspect Installation
Our first step in guaranteeing a successful waterproofing project is to meticulously inspect the membrane installation for proper coverage and adhesion.
We’ll start with a thorough adhesion inspection to confirm the membrane sticks well to the foundation. Proper waterproof coverage is essential, so let’s look for any gaps, bubbles, or wrinkles that might compromise its effectiveness.
Next, we need to check for any defects. Defect identification involves scanning the membrane for signs of damage or wear. We want to be sure that the membrane is securely fastened and sealed to prevent water infiltration. Any detected flaws should be addressed immediately. This is also the time to confirm that the installation aligns with manufacturer standards.
To make sure we’re on the right track, we should verify that everything meets industry specifications for waterproofing. This means paying close attention to details and not cutting corners. If there’s any doubt about a section, it’s better to fix it now than face potential water damage later.
Frequently Asked Questions
How to Install Waterproof Membrane on Foundation?
To install a waterproof membrane on a foundation, we start with foundation preparation by cleaning and filling cracks. Then, we apply the membrane using recommended techniques. Various membrane types include liquid and sheet membranes, each with specific installation methods.
What Is the Best Method of Foundation Waterproofing?
Why choose exterior vs interior waterproofing? Exterior waterproofing is more effective, preventing water entry from the outside. Let’s not forget the benefits of professional installation: it guarantees quality, durability, and peace of mind.
How Do You Waterproof Foundation From the Inside?
To waterproof the foundation from the inside, we apply a liquid membrane like Aqua-Bloc with a trowel. Interior solutions provide effective protection, while exterior methods offer additional security. Let’s create a safer, water-resistant home together!
How Long Must You Wait to Apply Waterproofing to New Foundations?
‘Good things come to those who wait.’ We must wait at least 28 days for proper curing time and preparation. Considering weather conditions, we make sure the concrete is ready for waterproofing application, guaranteeing long-lasting protection.
Conclusion
So there you have it, folks! By following these steps, we’ve secured our foundation is well-protected against water damage.
Isn’t it satisfying to know that our hard work will keep our home dry and secure for years to come?
Let’s take pride in a job well done and enjoy the peace of mind that comes with a properly installed waterproof membrane.
Ready to tackle your next DIY project? We’ve got this!